We're not professionals at all but we get by. We do what I think a lot of DIYers do - google the crap out of what we need to know how to do.
One thing that we couldn't find anything about is how to build a fireplace surround that goes all the way to the ceiling when your ceiling is a slanted ceiling. I am an expert Google searcher and I could find nothing. So here's what we the Man did if you need to build one and haven't a clue how to start.
First, he went out and bought two things. A Plumb Bob and a yellow do-thingy. You know, that's not really very technical for when you want help.
All of a sudden, everything seems done and all that's left to do is organize all my crap and clean the rest of the house that we've treated like a construction zone.
Remembering that my camera is broken and all I have is my ipod to take photos with, here's what's been going on. Also, this blog is for us to document all the things we do to our house...so be prepared for lots of photos of what may seem like the same thing, but isn't.
Last I left you, the floor had gone in and was beautiful. Now it has a bit more character after being in our house for a while. You know, tools falling and us scraping stuff across the floor. We're not used to being careful with such nice things in the back room.
The Man started to work on our bookshelves. We used 5 Billy bookshelves from Ikea and the rest he built and modified. One of the specifications that we wanted *cough* I wanted *cough* was a secret door that went into the crawl space above the bathroom. An old house = sucky storage. The other was that I wanted it to look built in.
First he built a base to raise it so that we could use our 7" baseboard that we had all around the room.
 |
| Bookshelf base |
This continued in front of the place where the door to the kitchen went. The one we blocked up.
 |
| Bookshelf base continued. Exciting stuff here. |
Then he started placing the Billy bookcases on the base. Here you can see the storage space above the bookshelf and the blocked up doorway.
 |
| Putting in the Billy bookshelves |
 | |||
| The bookshelves in place. |
 |
| The secret door is open. |
 |
| The secret door is closed. |
 |
| Here's what the kitchen door looked like before the magic happened. |
 |
| And here's after. Kinda. |
 |
| Edges are trimmed and wood filled |
 |
| The painting begins! Finally. |
 |
| I don't know why, but Ikea's 'white' furniture is pee yellow. It all had to be painted. With lovely oil based primer. |

 |
| Note the cute little shelf that was built to match up to the other ones? No idea what we'll put in there. Maybe we'll have to start collecting something. |
So that is our bookshelf that I absolutely LOVE. I will leave you with a sneak peek of what it looks like mostly filled up with furniture on this side of the room. I'm currently organizing (that's why it's messy) and just though I'd take a break and a photo to show you.
We've been trying to push ourselves to get this back addition done by Christmas. So we've been doing lots of stuff and I'm way too lazy to write about it all, so here's some photos. And they're not even nice photos cause my camera decided it's had enough, so you're stuck with photos from my ipod. :-D
 |
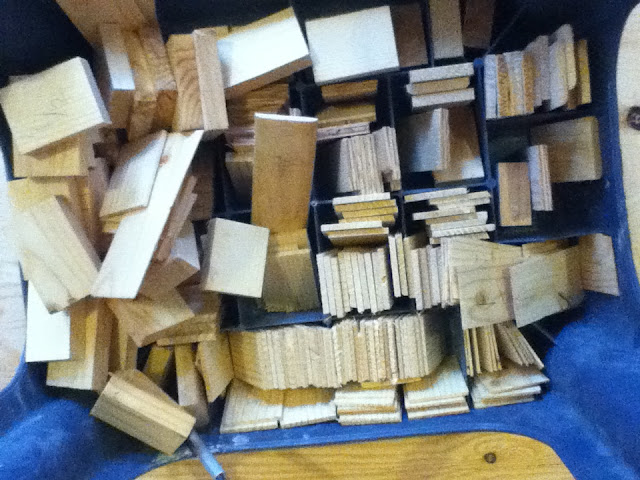
| All the tiny pieces of shim the Man cut to level the floor |
 |
| From 2 inches down to 5/32 |
 |
| We marked every foot on every shim and levelled using the little shims |
 |
| Then the Man cut strips of wood that were the proper heights and leveled the Entire. Floor. |
 |
| Building the fireplace surround |
 |
| Had to figure out how to do that with an angled ceiling |
 | ||||||
| Almost all drywalled | ||||||
|
 |
| Put up all the window trim, filled in the holes, caulked and painted |
 |
| This is what one side of the french doors looked like |
 |
| And this was the other side. With a little writing from a previous owners kid. It's supposed to say Happy Day from Gabby. |
 |
| Primed one |
 |
| Painted one |
 |
| Superior flooring. Black Walnut au Natural |
 |
| The beautifully leveled floor just before the hardwood went down |
 |
| And after!! Instant gratification. Done in 7 hours. |


