I know that when we were looking to rip the bloody pool out, I looked all over the web for photos and an idea of how to go about it. And how to go about it as cheap as possible. We don't mind labouring for what we want. We do hate paying exorbitant amounts of money to get it done.
We bought our house with the bloody pool, it was put in about 10 years before, but none of our family members are pool people. We like beaches. And a yard.
So, how did we go about it you ask?? Let me tell you. It didn't take as long as we thought it would but it was hard labour.
This is the bloody pool before. It was the end of the pool season and we let it go green.
We began by ripping apart the deck and letting the bloody pool drain as much as possible.
We unscrewed the edges of the bloody pool. I don't know the proper term for them, but it's the white trim along the top. You can see that two sections are already off. We also put the kids to work.
When you have no water in your pool, the sides then begin to fall away from the walls. I'm sure you know that though. Since we didn't put the bloody pool in, we didn't really have any idea of what was going to be under the liner. We had pulled the liner a teensy bit away from the wall, so we knew there was metal sides of some sorts, but it was all going to be a bit of a surprise...
We started to rip, I mean, take the liner off of the bloody pool and shop vac up all the extra water so that it wouldn't be so hard to deal with. Nasty green slimy water is not fun to swim in.
We finally got the liner off and nicely folded. Some guy off of our local freecycle was looking for a pool liner to make a pond with and since we so conveniently had a nice, slimy-pond like liner to give away, he came and got it. Recycling works! Didn't have to pay for disposal...that works with our 'do it for cheap' attitude. The green slimy look on the pool is what happens when you have a leak in your liner and ignore it.
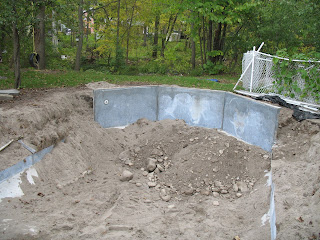
If we had just tossed dirt in the hole, we may have ended up having a pool of a yard from drainage problems...so my lovely, strong husband pounded holes in the bottom of the bloody pool with a sledgehammer to ensure we didn't have that problem. What a good guy he is.
(for some reason this photo won't upload the right way up. sorry.)
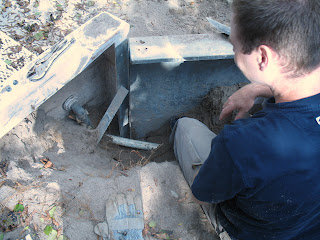
Then came all the pipes. We dismantled all the piping around the bloody pool. We had to dig out a lot of sand that had been back filled behind the walls.
We threw that sand into the pool. Drainage, right?? And we let the kids take a break from work and make some castles. Just like the beach.
Here we are pondering on how the braces work and how the sides are going to come off. They were welded on the top and cemented at the bottom...
We decided to use the reciprocating saw to cut them. First we had to dig all the sand out from behind the walls. Next we cut the braces, which had cement holding them in at the bottom. Then we took the saw and just went to town as low as we could go without getting kickback from hitting cement...There's no pictures of us doing that because I am the photographer of the family and I also like destruction, like cutting metal things down. I am proud to say I was busy cutting down the bloody pool sides that day and didn't have time to take photos.
Once again, thanks to freecycle and a man building an addition, we received some free fill. About 2 1/2 dump trucks full of free fill. In our driveway. For us and others we connived and fed to help us wheelbarrow it into the hole.
Ahh, the stairs. I think this was one of the harder things about ripping the bloody pool apart. The bottom step was cemented in and it was held down by pipes. Out came the saw and brrp, out it came. Not as easy as it sounds. It was a pain but it's all gone now.
Then came the work crew। They almost emptied the driveway but one day wasn't quite enough. Thank you to all who helped us that day and other days. Your strong arms and backs were invaluable to us!
We slowly filled the hole and after a few layers, used a compactor to smoosh it all down. We hoped that by doing that, it would lessen the sinking effect over the years. The dirt that was given to us was pretty high in clay content so even after a few winters it hasn't sunk at all.
This picture is after the winter in the springtime. We threw a bit of topsoil and compost on the yard, rolled it out and prepared it for some sod.
And here is where we were teaching the kids about instant gratification.
And then we were done. We had very negative Nellie's walking by our house telling us we would never get done. Poo on you cause we did it!! Took us two months for a majority of the work to be done and now that we have a lawn - the work will be never ending...
But we play catch and kick soccer balls around and play badminton on it. We use it more than we ever did with the pool. We used to just watch the neighbours swim in it...
If you want to see more photos of our pool destruction, you can check them out here.
Subscribe to:
Posts (Atom)


